Getting Started with DeskDirector
Admin Console
Admin Console : Getting Started
Portal
Settings
Profile
Branding your DeskDirector Portal via Brand Packages
Color Theming a Portal via Brand Packages
Avatars in the DeskDirector Portal
Features
Enable/Disable Chat Callback Feature
Enable/Disable Pre-Ticket Chat
Enable or Disable the 'Something Else' Option
Embedding Media as the Help Page
User Groups
File Storage
Tickets
Permissions
Portal Permissions in DeskDirector
FastTrack in DeskDirector
Setting Up and Using the VIP Priority
How to setup the Flag feature (ConnectWise)
Have Approvals go to Approvers according to site (ConnectWise)
Quotes (ConnectWise)
Invoices (ConnectWise)
Request Types
Setting up Request Type Items
Request Type Ordering in the Client Portal
Getting Started with Request Type Groups
Forms
Getting started with DeskDirector Forms
DeskDirector Forms - Question Types in Detail
DeskDirector Forms - Dynamic Fields
DeskDirector Forms - Dynamic Fields Implementation Example
DeskDirector Forms - Sections and Conditionals
DeskDirector Forms - Embed content
DeskDirector Forms - Replace Summary Field with Title Automation
Importing Wufoo Forms to DD Forms
DeskDirector Forms - Dynamic content
DeskDirector Forms - Field value format for automation
Sharing Forms
Companies
User Groups
Managing Companies in DeskDirector
Filtering Companies to Manage
Exporting Companies as CSV
Contacts
Managing Contacts in DeskDirector
Exporting Contacts as CSV
Ticket Group Permissions
Contact Impersonation
Menu Group
Menu Items
Intro to Menu Items
Creating Menu Items
Extension Menu Security and Query Paramaters
Adding BiggerBrains Menu Item
Learning Center
Getting Started with the Learning Center
How to change the name of the Learning Center
Useful Learning Center Tips - Adding files from Google and Dropbox
Notebooks
Portal Access
Notifications
Desktop Installer
Feature Preview
Tech
Email Notifications Overview
Setting up Global Email Notification Settings
Setting up Office 365 Mail Delivery
Setting up SMTP Server Mail Delivery
Setting up SendGrid Email Delivery
Getting Started with Email Template Engine - DeskDirector
Creating Custom Email Template
Setting Email Templates for Notification Events
Email Templates Auto Login Link
HTML Email Templates - ConnectWise
HTML Email Templates - Autotask
ConnectWise - Avoid Aggressive Notifications
Troubleshooting email delivery issues using "Delivery History"
System
Feature Configuration
Default Ticket Board and Source
Setting up your Approval Statuses
Adding a VIP Priority via the Admin Console
Automatic Contact Creation
Setting Reopened Ticket Status
Setting Status when Ticket is Closed
Change Ticket Status when Customer Adds Note
Hosts Configuration
PSA Integration (ConnectWise/Autotask)
Setting Office Hours
Enabling OAuth (Microsoft Login) for DeskDirector Portal
Logging in with Passwordless
Global Magic Token: Logging in via URL
Client Portal Office365 Single Sign-On
Switching from Custom Application OAuth to the new OAuth
Integrations
ConnectBooster
Wise-Pay
QuoteWerks
ConnectWise Sell (previously Quosal)
How to configure ConnectWise Sell (previously Quosal) Order Porter integration
Adding ConnectWise Sell (previously Quosal) Order Porter link to opportunity
Microsoft Flow (Power Automate)
Get started with the DeskDirector Power Automate Connector
Power Automate Administration
Power Automate Template Gallery
Featured Solution: Teams Ticket Discussion
Featured Solution: Ticket Briefing
DeskDirector Connector Triggers
Action: Create an email from template
Power Automate Connector - Setting up your first flow
Advanced
Deleting Orphaned Tickets
Developer Corner
Workflows
Managing Webhooks
ConnectWise API Integration Tester
Autotask Data Sync
Diagnose Entities Tool
Analytics
Account
Surveys
Task Lists
Service Agent Change Log
Auditing and Analytics
Contact Authentication Audit Log
Tech Portal
Tech Portal : Getting Started
Tickets
Managing Tickets from the Tech Portal
Tech Portal Ticket Details
Creating a Ticket from the Tech Portal
Request more information (forms request) with Task Forms
Enable/Disable Time Entry Timer Autostart
Broadcasts
Chat
Getting Started with DeskDirector Chat
Handling Chat Requests
Viewing Chat History from the Tech Portal
Creating a Chat Session from the Tech Portal
Changing your Presence
"Pre-Ticket Chat" Feature
"Call me Back" Feature
Macros
Notifications
Client Portal
Client Portal : Getting Started
Contact Support
Creating a Ticket from the Client Portal
Submitting a Generic Ticket
Creating a Chat Session from the Client Portal
Viewing Chat History from the Client Portal
Tickets
Approvals
Quotes & Invoices
Learning Center
BiggerBrains
Notifications
A walk through all the fields available in DeskDirector forms
Logging in to DeskDirector Workflow
Deskdirector - Sign up walk through
DeskDirector Roles and Permissions
Features
Tickets & Chats
Notifications & Broadcasts
Custom Forms & Request Types
Custom Branding
Custom Menus
Custom Email Templates
Surveys in DeskDirector
Approvals in DeskDirector
Easy Integrations
Advanced Authentication. No password, Single Sign On, MFA and beyond?
BiggerBrains & Learning Center
Analytics
Other DeskDirector Features
Ticket Dynamic Contents
How Tos & FAQs
APIs and Integration
ConnectWise SOAP API credential
Creating an Integrator Login in ConnectWise (SOAP API)
Creating a ConnectWise RESTful Integrator API Key
ConnectWise 2019.5+
Autotask integration major update 2022
ConnectWise Member Impersonation
Autotask Resource Impersonation
Creating an integrator API resource in Autotask
Autotask 2020.3 integration (API) resource migration
Third-party integration with DeskDirector
Authentication
How User Authentication works in DeskDirector
Setting/Resetting a Contact's Password
Logging in with Active Directory
Desktop Portal
Desktop Portal v4 Installation - For the Legacy App
Diagnosing DeskDirector Desktop Portal Issues
Diagnosing automatic login issues (ActiveDirectory) using the DDGetSID CLI tool
Antivirus Blocking DeskDirector Portal Installation
Troubleshooting your DeskDirector Portal installation
DD Portal for Mac: Labtech Deployment Guide
DDPortal removal tool - uninstalling Windows portals
Deploying DD Desktop Portal v5 via PowerShell
Desktop Portal v5 Installation & Common Issues
Instance & Account Queries
Setting up your custom domain
Contact Limits FAQs
Finding out what server your DeskDirector instance is on.
How search works in DeskDirector products
Portal and User Issues
User can't log in
DeskDirector Portal Browser Support
Contact can't login portal, the contact is missing in admin console but it is in ConnectWise
DeskDirector Tech Portal - How to take advantage of browser tabs
Add DeskDirector Tech Portal as a Custom Menu item inside ConnectWise Manage
Sign in with Microsoft Issue in Tech or Admin Console - "Need Admin Approval"
How do I add Tech Members/Contacts/Companies to my DeskDirector instance?
Time Stamps in DeskDirector Portal
Missing contacts or companies in DeskDirector but they are in my PSA
User Group FAQs
Chat permission granted but "Chat" option is missing on "Contact Support" page
How do we set a landing page for the client portal?
Tickets
User can't see "All Tickets" option
Tickets are missing in DeskDirector but they are on my PSA
My customer is seeing deleted tickets in portal
Ticket Description missing on ConnectWise emails
Other Articles
Top 10 Request Types
Generic vs Customized Request Types
Using Markdown
Desktop Portal (Installed client) Vs. Web Portal (Web Client)
Outdated Articles
Common WuFoo errors
Changing the Summary of Wufoo Tickets
Creating your first Wufoo form
Adding Wufoo Forms To Request Support
Getting started with WuFoo Forms
Debugging Your Wufoo Integration
Switching PSA or merging with another CW/AT instance
How to Allow Time Entries for StreamlineIT Members
Essential and Dynamic Plan Breakdown
Advanced Use
DeskDirector API
Subscribing to Chat Webhooks
Portal Deep Linking
Webhook Example with Zapier
Chat Session Payload
Legacy URL Linking in DeskDirector
Get started with portal extension page demo
Dynamic content based on logged in user
Clean Tickets
Exporting Portal Usage
TimeZest integration with DeskDirector
Troubleshooting Connectwise/Autotask-related integration issues
Release Notes
Client Portal
Server
Tech Portal
Portal Release Notes - Windows/macOS
Differences Between different Desktop Portal version
Portal Release Notes - Web Client
Release Notes in the Admin Portal
Glossary
Security
Microsoft Teams App
Introducing the DeskDirector for Microsoft Team App
Setting up Content Security Policy (CSP)
Installing the Microsoft Teams App (Tech)
Setting up Tags for Teams Discussions (Tech)
Setting up DeskDirector for Microsoft Teams for your clients (Client mode)
Branding the DeskDirector Teams App
DeskDirector Teams App Notifications
User Groups Integration with Microsoft Teams
Troubleshooting
Contact Support
Advanced topic: Setting up Tech & Client Mode in the same tenancy
Integrating Microsoft Teams with DeskDirector Tech Portal
Ticket Summary for Tech Portal
- All Categories
- Getting Started with DeskDirector
- Admin Console
- Setting up Office 365 Mail Delivery
Setting up Office 365 Mail Delivery

Emails sent from DeskDirector to your customers can be configured either to use SMTP or using an Office 365 email account. v1.31 of the admin console (released 26th of Oct 2021) introduced the support for SendGrid email delivery.
This article guides you through the setting up email delivery using Office 365.
Before you start, these are what you need:
- An account with Office 365 mail license assigned
- A primary mailbox
- A shared mailbox (supported since 6th of April 2020)
Office 365 Mail Delivery Setup Guide
1. To get started, login to your DeskDirector admin console and head to Email > Settings then scroll down to Office 365 Mail Delivery section and click "Setup Office 365 consent"
2. On the page, click the Grant Consent button then enter your primary Office365 email address and click the Grant Consent button again.
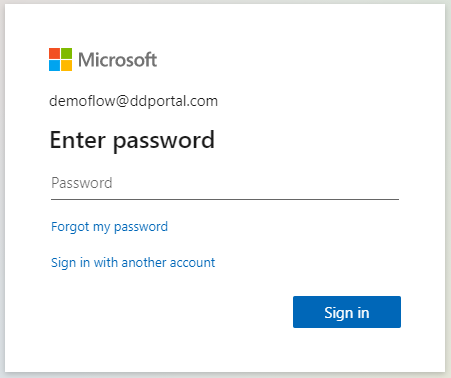
3. You will be lead to a sign in screen after granting consent, where you will need to enter your Office 365 password, then Sign in.
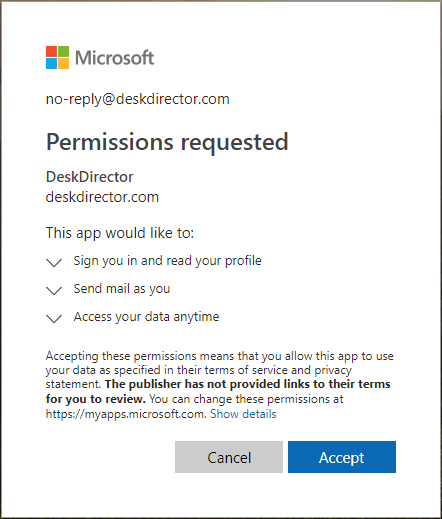
4. Review the permission required and click Accept.
5. Once you accepted the permission requested, you browser will be redirected back to DeskDirector Admin console.
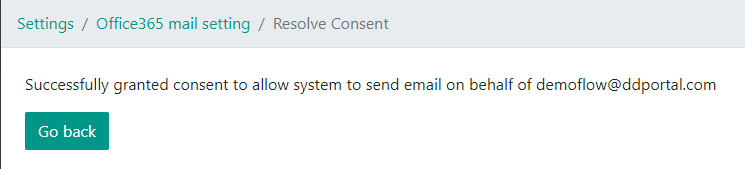
From there, you can verify the the email address that was setup to set emails from.
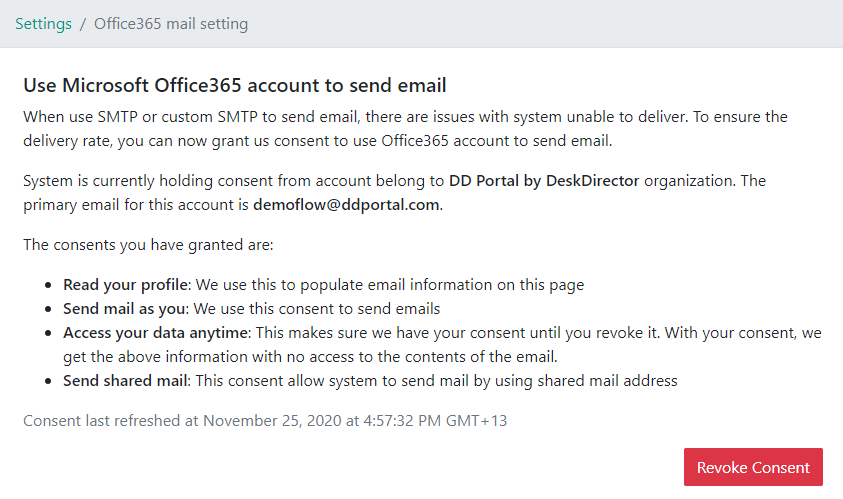
To remove an account, click the Revoke Consent button.
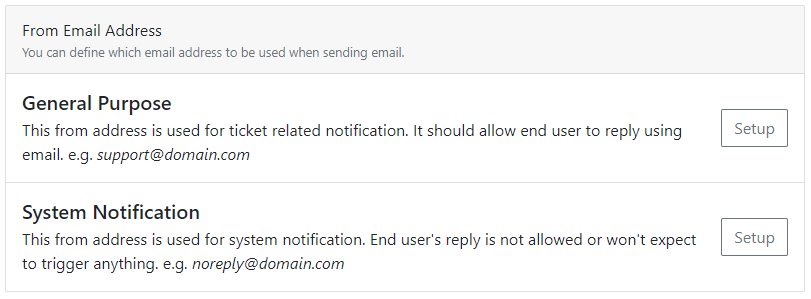
6. Once consent has been granted, you have the option to setup/modify the sender email address and display for General Purpose and System Notification emails sent by your DeskDirector instance.
How to create shared mail
As a general best practice, the shared mailbox is needed, as this will be used to used out "System Notification" emails like password resets and login token requests (aka "No Reply" email addresses). Follow the guide below to setup the shared mailbox
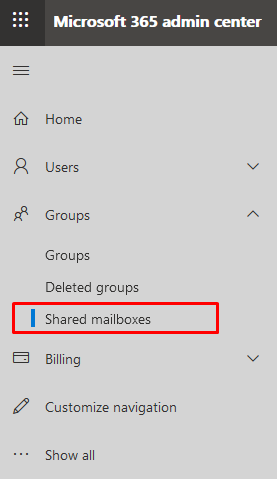
1. Head to Office 365 admin page > Groups > Shared Mailboxes
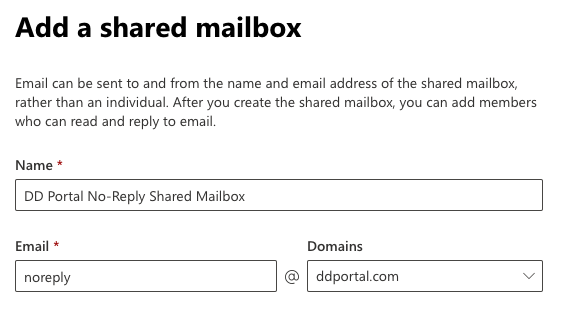
2. Click on Add a shared mailbox
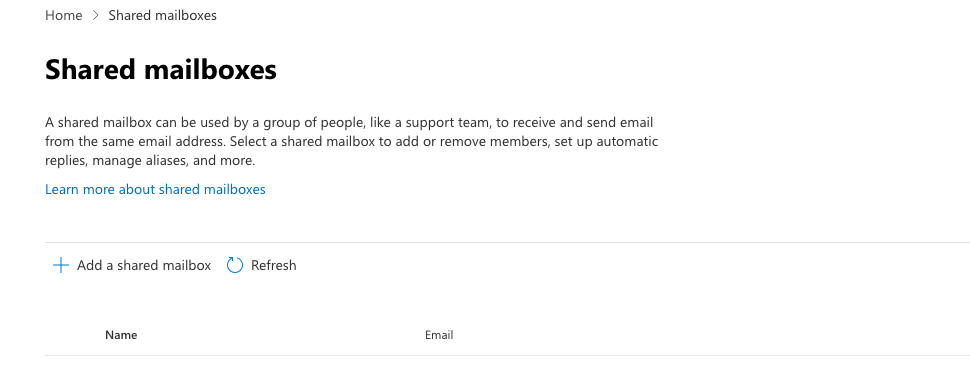
3. Provide the details needed to create the mailbox
4. Once the shared mailbox is created, all that is needed now is to add the primary mailbox as a member of the shared mailbox and enable the permissions for it.
Click on the shared mailbox name and it should pull up a window which looks like this:
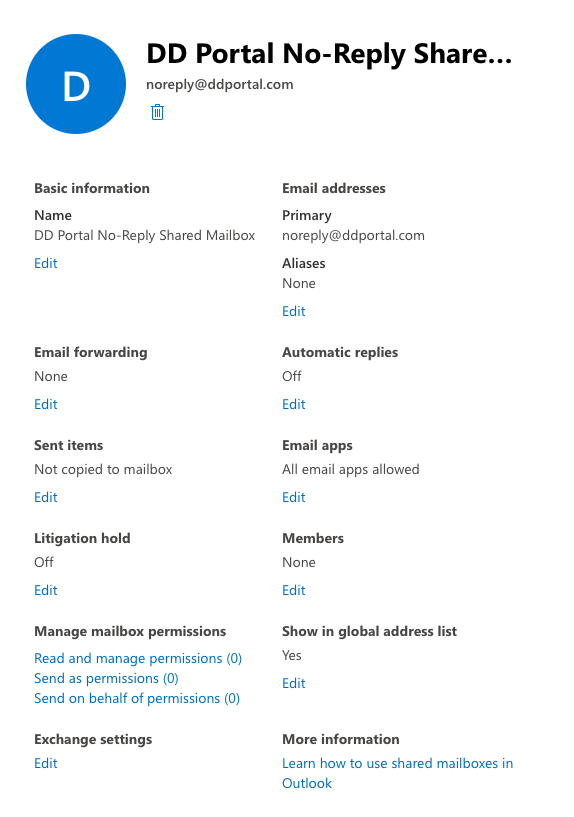
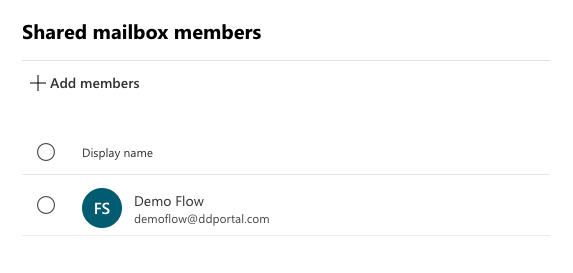
Click on Edit under "Members", then add the primary mailbox account to into the Shared Mailbox Members
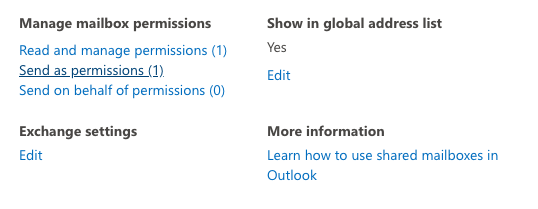
Go back to the main settings page, then review and doublecheck that the primary mailbox has the right permissions set under "Manage mailbox permissions". The primary mailbox only needs the "Read and manage permissions" and the "Send as permissions"
Office 365 Delivery Account - Tutorial
28 STEPS
1. Open DeskDirector Admin Portal and click Email.
2. Click Delivery Accounts.
3. Click New Account.
4. Type the Name for your account.
5. Click the Type drop-down.
6. Select Office 365 Outlook.
7. Click Create.
8. Click Setup.
9. Type in the primary email ID of this account.
10. Click Grant.
11. The Outlook authentication window will open. Type the password for the primary account.
12. Click Sign in.
13. Next, click No.
14. After authentication, you will be redirected back to the account setup page.
15. To setup the sender's email ID, scroll down and click Edit.
16. Type the Display name.
17. Type the email address.
18. Click Setup to save the details.
19. To setup the sender's no-reply email ID, scroll down and click Setup.
20. Type the Display name.
21. Type the email address.
22. Click Setup.
23. Next, scroll up and click the three-dot menu.
24. Click Test.
25. Now you can send a test email to check if the account is active. Type an email address.
26. Click Send test email.
27. If the email was sent, you will see the success message. Click Cancel to close this window.
28. That's it. You're done.
Here's an interactive tutorial
** Best experienced in Full Screen (click the icon in the top right corner before you begin) **https://www.iorad.com/player/2349855/Create-an-Office-365-delivery-account